How To Clean Vinyl Records: 7 Easy Steps
Cleaning vinyl records is easier than you might think.
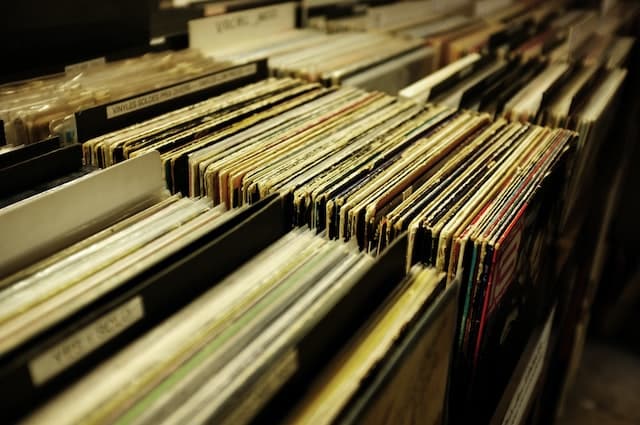
If you’ve never done it before, cleaning your records yourself can be a little daunting. If you’re like most vinyl lovers, you’re probably very protective over your record collection, and will not want any harm to come to your beloved vinyl!
Fear not. This guide will show you how to clean vinyl records safely at home without damaging them. With a little bit of guidance, cleaning records is easy, and can be done without the need for expensive products or equipment.
That said, with the resurgence of vinyl in recent years, there is a whole range of useful gear out there that can make the job even easier. For that reason, this guide will explain both how to clean records on a budget, as well as pointing you to recommended products for a more professional level of cleaning.
This guide covers the following points:
How To Know If Your Record Needs Cleaning
How To Handle A Record Without Damaging It
How To Clean Vinyl Records At Home
Note: this article contains affiliate links, which means Pink Wafer may receive commission if you buy a product (at no extra expense to you)
How To Know If Your Record Needs Cleaning
Cleaning your records is essential to prolonging their life and preventing them from getting damaged. But how do you know if your records need cleaning?
The fact is that if you really want to take care of a record, you should use a record brush before and after every use, to remove dust and static. In this respect, every time you play a record you should give it a ‘dry’ clean.
This also applies to brand new records, as they inevitably have small particles of dust on the surface. As for second-hand records, these will require some further inspection. In many cases, they will require a deeper ‘wet’ clean.
Whilst a little crackle and surface noise is arguably part of the charm of the vinyl record experience, the fact is that these sounds may indicate that the record needs a clean. Playing a dirty record increases the chance that you will work that dirt into the grooves and cause permanent damage to the vinyl.
How To Handle A Record Without Damaging It
Before we dive into the cleaning process, let’s quickly look at how to handle records. It’s important to handle records correctly so that you don’t add any more dirt or damage to the vinyl.
The golden rule is that you should not touch the top and bottom surface of the record at all. When handling the record, make sure you only touch the outer edge, or the middle section.
Touching the surface transfers oils and dirt from your skin which can damage the grooves, and it can also push dust and dirt further into the grooves.
As long as you stick to this one simple rule, you will be doing yourself and your records a big favour!
How To Clean Vinyl Records At Home By Hand
Let’s get on to the full process of how to clean vinyl records. This method explains a deep clean or ‘wet’ clean approach that should work for any records, whether old or new.
1. Brush off surface dust
The first step of cleaning vinyl records is to brush off any surface dust. Here you have two options. The DIY option is to use a new lint-free or microfibre cloth – the sort that you may already have at home.
However, if you are a vinyl lover, it is definitely worth investing in a record brush. Most record brushes are designed to be anti-static, and are purpose-built to dislodge dust from records. This brush from AudioQuest is pretty much industry standard and is relatively inexpensive. You can get a cheaper alternative from Spincare which is much cheaper, and almost as good.
Whether using a microfibre cloth or a record brush, you should follow the grooves of the record, and you should press lightly. The aim of this process is to dislodge any surface dust. Therefore it is vital that you are dislodging the dust and dirt, rather than pressing it deeper into the grooves.
It is vital that this first stage is a ‘dry’ stage. If you skip this step and go straight to applying liquids, you could be engraining dirt deeper into the grooves.
2. Prepare your cleaning solution
If you are working to a tight budget, you can create a simple cleaning solution from warm water and a small amount of mild dish soap. If you are not hugely precious about your records, this will get the job done. However, if you are serious about caring for your records, it’s better to invest in a bottle of record cleaning solution.
The water from the tap varies in quality depending on where you live, so distilled water is highly recommended. However, for not much more money, you can get a purpose-designed record cleaning solution, so for most people, that’s definitely worth doing.
I’ve used VinylClear’s deep track cleansing solution with good results. It’s a well-trusted brand, and I’ve seen it used by professionals in record stores.
If you’re looking to save money, Ecomoist vinyl cleaner is a cheap alternative that is eco-friendly, and comes with a microfibre cloth.
If money is no object, GrooveWasher is a long-established favourite amongst vinyl lovers. This kit from GrooveWasher also includes a nicely-designed, and rather attractive cleaning pad.
3. Prepare your workstation
The next step is to set up your workstation. The easiest method is to lay down a microfibre cloth on a flat surface on which you can place your record. However, the ideal situation is to have some sort of turntable to work with, so that you can easily rotate the record.
An old, broken turntable is ideal, or you can also use a ‘lazy susan.’ Having this isn’t essential, but it will make the job easier. If you can set up a workstation like this, then you’re halfway towards having a ‘manual’ version of what the professional electric kits do.
Make sure you have decent light so you can get a good view of the record to reveal any hidden or trapped dirt.
4. Apply the cleaning solution
Now it’s time to apply your cleaning solution. If you are using the budget method of a microfibre cloth and distilled water (with a little dish soap), then you should dab the cloth in the liquid. It should be damp, but certainly not dripping.
Gently run the cloth against the record, starting from the middle and following the groove in a clockwise direction until you get the outer edge of the record. You shouldn’t need too much liquid. If you leave any visible wetness on the record, you’re probably using too much.
If you’re using a record cleaning solution or spray, then take a look at the instructions on the bottle. Most of these are sprays, and will require an even spray on the surface. You’ll then use your cloth in the same way as described above.
Once you’ve worked clockwise around the grooves, you can then go in the other direction (the same direction the needle would track if you were actually playing the record).
5. Repeat and spot clean
Repeat the process as necessary. If you find any particularly dirty spots, then feel free to apply a little extra cleaning solution. However, you should not be in any way rough with the record, and you should follow the grooves, rather than working against them, since this could push dirt in deeper.
In the case of some cleaning solutions, once you have applied it you should rinse the record with distilled water to remove any traces.
6. Ensure the records are dry
You should be able to remove the majority of the moisture from the record with the dry part of your cloth. However, you need to ensure that the records are totally dry. If you’re working to a budget, then you can simply let your records air out on a toast rack, a dish rack or similar. However, for the best results, you may go the extra mile by using a vacuum.
One of the main advantages of high-end record cleaning machines is that they use a vacuum. This minimises physical contact with the vinyl, which is a really good thing. It also does a great job of removing any leftover dust, and drying off any leftover moisture.
It is possible to fashion an attachment to your average home vacuum cleaner to do this part of the process (as per this video). The easiest way to vacuum your records, however, is to use an electric record cleaning machine with a vacuum built in. Pro-Ject are one of the leading brands, and the Pro-Ject VC-S2 is an impressive machine if you’re willing to invest.
Spincare offers a pretty nice budget record cleaning machine. For a little more, you can get a similar designed machine from Spin Clean. Both are well-reviewed, and will undeniably make the job easier, and more thorough. However, these cheap cleaning machines lack the vacuum that you will find in a Pro-Ject, which is what will take your vinyl record cleaning to the next level.
7. Replace records into sleeves and store correctly
Once your records are clean and dry, it’s really important to store them correctly. Records should not be stored flat, as this can warp them. If you truly want to keep a record in its absolute best knick, you should also consider replacing the paper sleeve with a plastic one. Paper sleeves can react with the record, causing damage over time.
Keeping your vinyl records clean
One of the joys of vinyl records is the physical nature of putting them on and listening to them. However, the flip side is that records require a little bit of extra care.
The reality is that every time you play a record it will undergo a little bit of wear and tear. To keep your records in tip-top shape, you should consider the following.
Use your record cleaning brush every time before you play a record. This will ensure that each time you play it, no dust or dirt particles are getting scratched into the grooves.
Keep your needle clean. A dirty needle will likely cause micro damage to your records, so this is essential.
Clean any new (and especially any used records) before you use them.
Make sure to only touch the outer edges or middle of the record.
If you follow these tips, your records should enjoy a long life!
FAQ How frequently should I clean my records?
You should use a record cleaning brush on your records each time before and after you use them, to remove surface dust and build up of static.
The situation is a little different with deep cleaning. If you take good care of your records, they may not need a deep clean for years.
A wet clean or deep clean is generally only necessary in the case of records that may have been used quite a lot, mishandled, or neglected.
Can you clean vinyl records with alcohol?
Some record enthusiasts are strongly opposed to using alcohol for cleaning records. But the reality is that many of the best record cleaning products do contain a small amount of specific types of alcohol.
As a general rule, if using alcohol, it should only be a small amount. If in doubt, pick up some specially designed record cleaning fluid from a reliable brand like VinylClear or GrooveWasher.
How do you clean really old vinyl records?
Whether the record you’re cleaning is new or old, you should clean it in much the same way. The only exception is old shellac records – for these, you should avoid alcohol altogether.
Bear in mind that it might take some patience to clean a really dirty old record. You may have to repeat the above process several times to get it up to a decent standard.
Can you clean vinyl records with vinegar?
Although vinegar is useful for many household cleaning applications, you must not use it to clean your records. Vinegar contains acid which can cause damage to the record, especially if it comes into contact and reacts with other record cleaning products that have been used on it at a different stage in its life.
The finer points of how to clean vinyl records are hotly debated by record enthusiasts, and there are a lot of opinions out there. This article covers the basics that any one who is new to the process will need to know.
Got any better methods or recommendations? Please drop a comment below.
The post How To Clean Vinyl Records: 7 Easy Steps appeared first on Pink Wafer.
Latest Shows
Latest news
Gallery
-


Comments
This post currently has no comments.