Make A House Bass With The Juno-60
In this tutorial, we dial in the perfect bass sound for classic and deep house using Roland’s Juno-60.
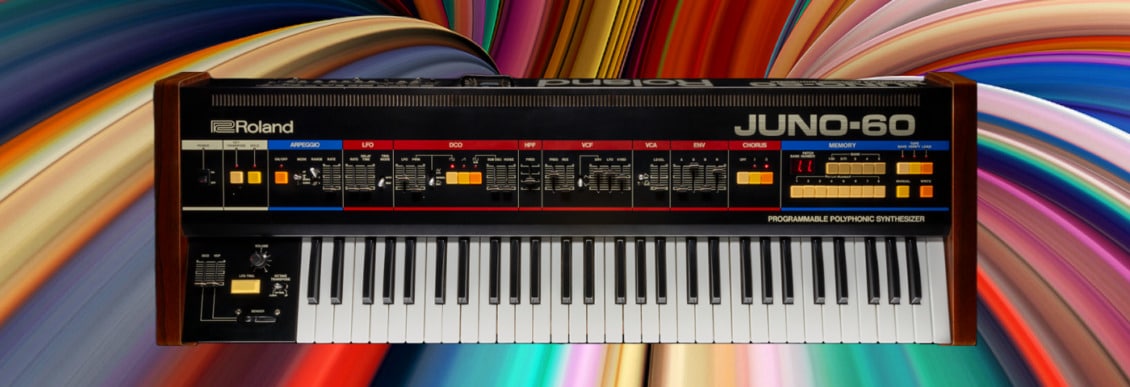
This year is the 40th anniversary of the Roland Juno-6 and 60. Released in 1982, the polyphonic synthesizer was the first in the Juno line and an instant classic. With its relatively simple synthesis structure, it was easy to whip up sounds quickly. It also sounded amazing, with a clean and crisp tone that worked equally as well in new wave, as in house tracks.
In today’s Synth Secrets, we’ll show you how to craft a classic house bass. We’ll be using the Roland Cloud version of the Juno, but the techniques here can also apply to the JU-06A Boutique model, the recently released Juno-X, and the Plug-Out version running on System-8, and of course the original hardware Juno-6 or 60.
Here’s the sound we’re going for in the context of a track:
N.B: We recommend following along with headphones or studio monitors as some of these results can be subtle. As ever, click any image to see a larger version.
[advert] A Quick Overview of the Roland Cloud Juno-60
The Roland Cloud Juno-60 is a single-oscillator, six-voice virtual analog synthesizer. It uses DCOs (digitally controlled oscillators) instead of VCOs (voltage controlled oscillators). The difference is a clean and tight sound, without pitch drift.
Looking at the front panel, we can see how the signal flows from left to right. It has a single LFO and then the DCO section, with oscillator footage in the Range section. It has mixable waveforms of square and sawtooth, with pulse width modulation for the square. It also has a sub-oscillator for adding extra low-end, plus a noise circuit.
Moving on to the filter, there’s a non-resonant highpass and a resonant lowpass, with controls for cutoff frequency and resonance, and bi-polar sliders for envelope amount, LFO and keyboard tracking. There’s also a dial to set velocity sensitivity.
Unlike the original hardware, the Cloud version has two envelopes, with Envelope 1 hard-wired to the filter and Envelope 2 available for the VCA. Note that you can also set the VCA to Env-1 for single-envelope authenticity.
Lastly, there’s the famous Juno chorus, with two settings, I and II. There’s also an additional effects section with delay, reverb and other effects types.
Of course, there’s more to the front panel but this is enough to get us started. Let’s dive in.
[advert] Step 1: DCO
We start by placing a copy of Juno-60 on a MIDI track, calling up an initialized patch, and programming in a bassline.
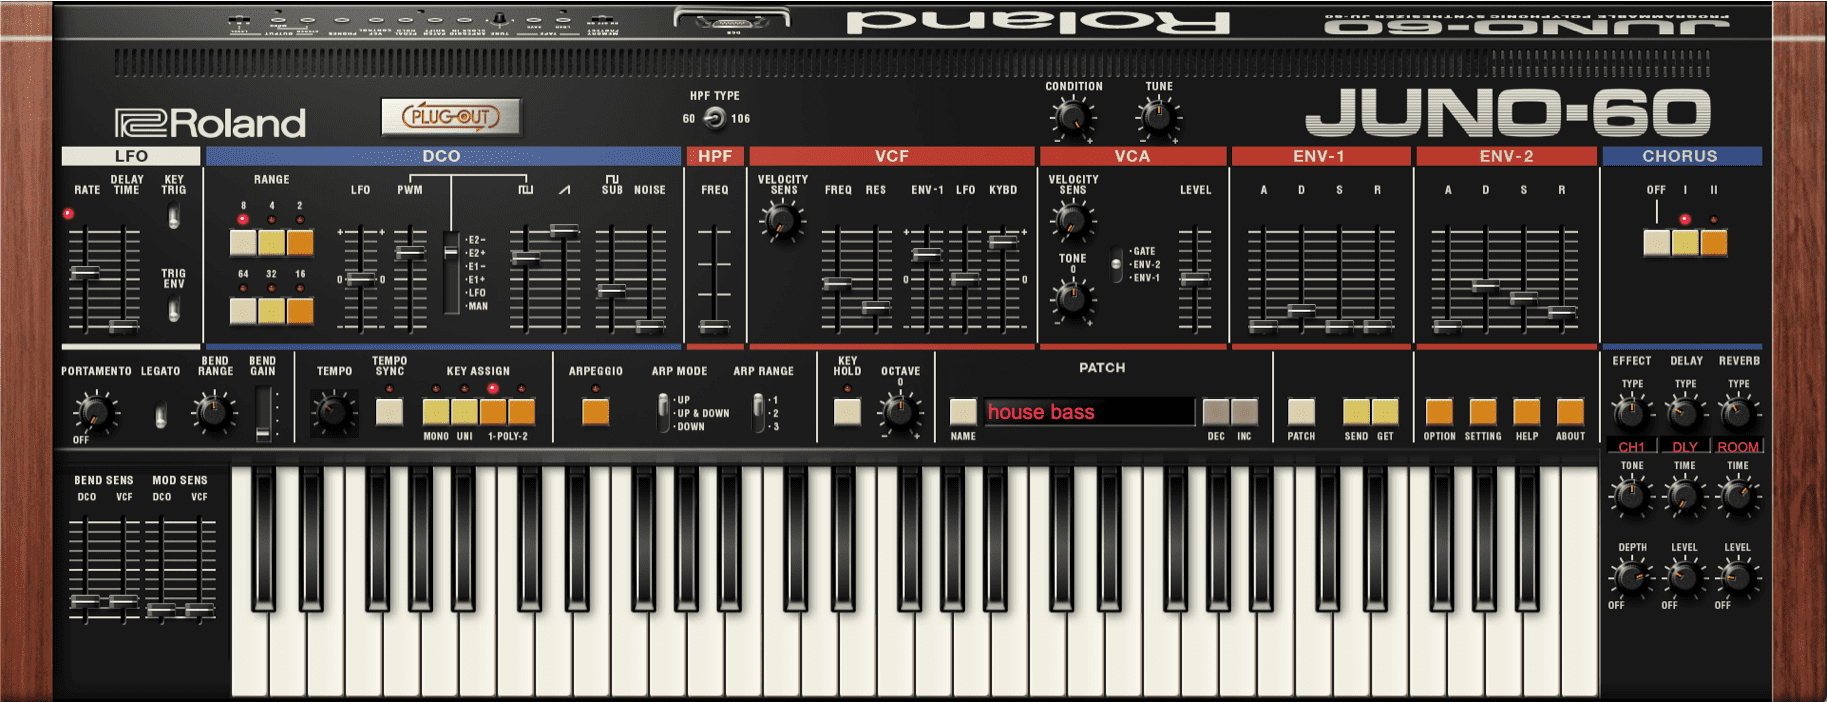
Turning our attention to the DCO section, we can see that the DCO is already on 8 feet, the lowest setting and the best for bass. This is perfect. Next, let’s set the waveform mix. We’re going to blend the two waveforms but favour the sawtooth for extra harmonics. We bring the sawtooth all the way up, square about 75% up, and then raise the sub-oscillator slider to around 45% to thicken up the low-end.
Finally, let’s use PWM (pulse width modulation) to add a little movement to the bass sound. We bring the PWM slider up to 75%. We’d like the modulation to follow the curve of the envelope, so we set it to E2+ rather than have it synced to the LFO. Now, it will follow Envelope 2 (which we’ll set up in a later step).
The bass so far:
[advert] Step 2: Filter
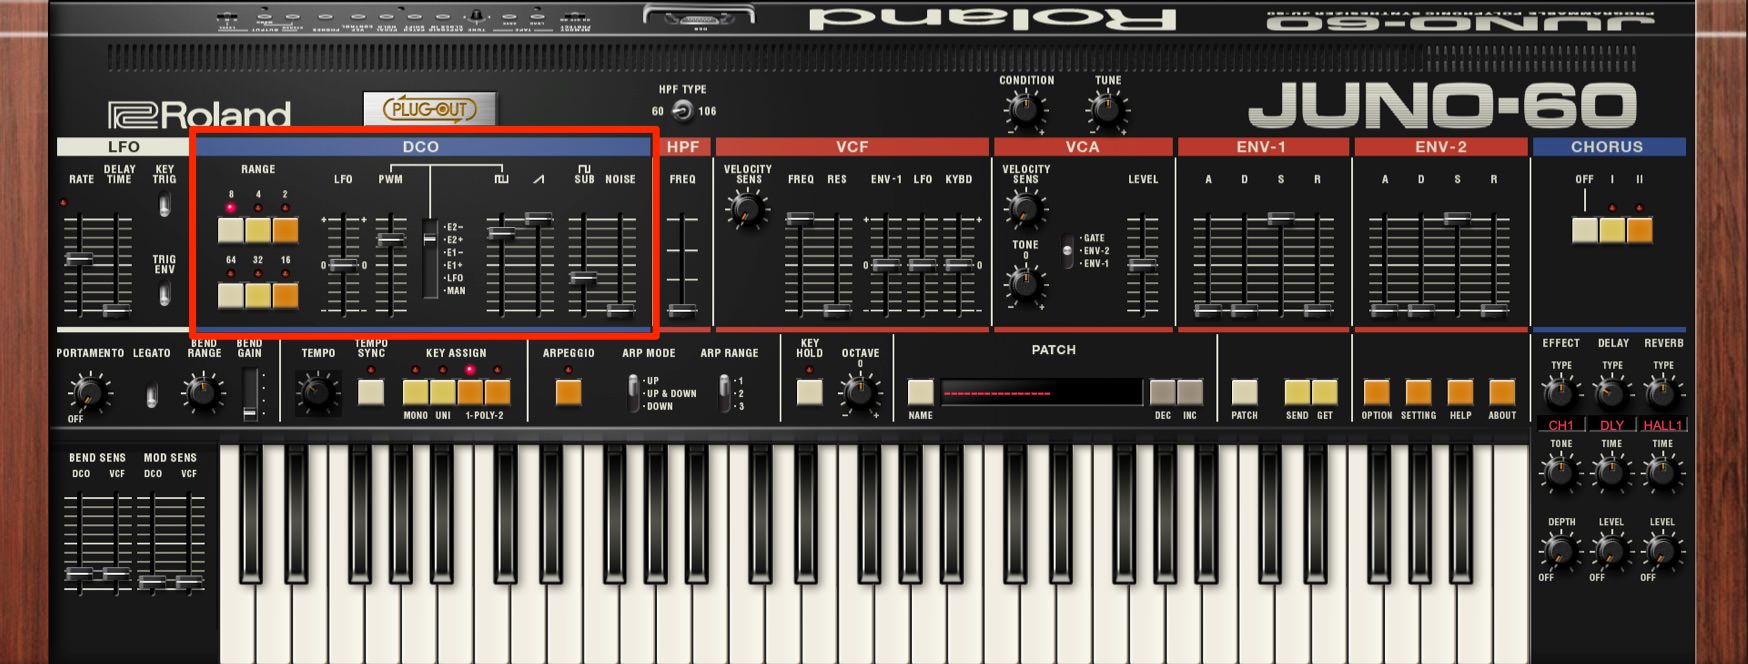
We’ve got a good starting tone but it’s much too bright, especially for bass. We can use the filter to shape the frequencies.
We start by bringing the frequency cutoff down to the halfway point. We can always go lower for a more subdued feel, but this sounds good for now. We also add a little resonance to give it some bite. Next, we bring up the keyboard tracking, here called Kybd. Keyboard tracking simulates the way acoustic instruments behave by lowering the cutoff more on bass notes and opening it for high notes.
Top Tip: The Roland Cloud Juno-60 has two highpass circuits, the original Juno-60 and the Juno-106. The 106 has a bass boost at the lowest setting. Use this for a more pronounced bass sound.
Now with filter applied:
[advert] Step 3: Filter Envelope
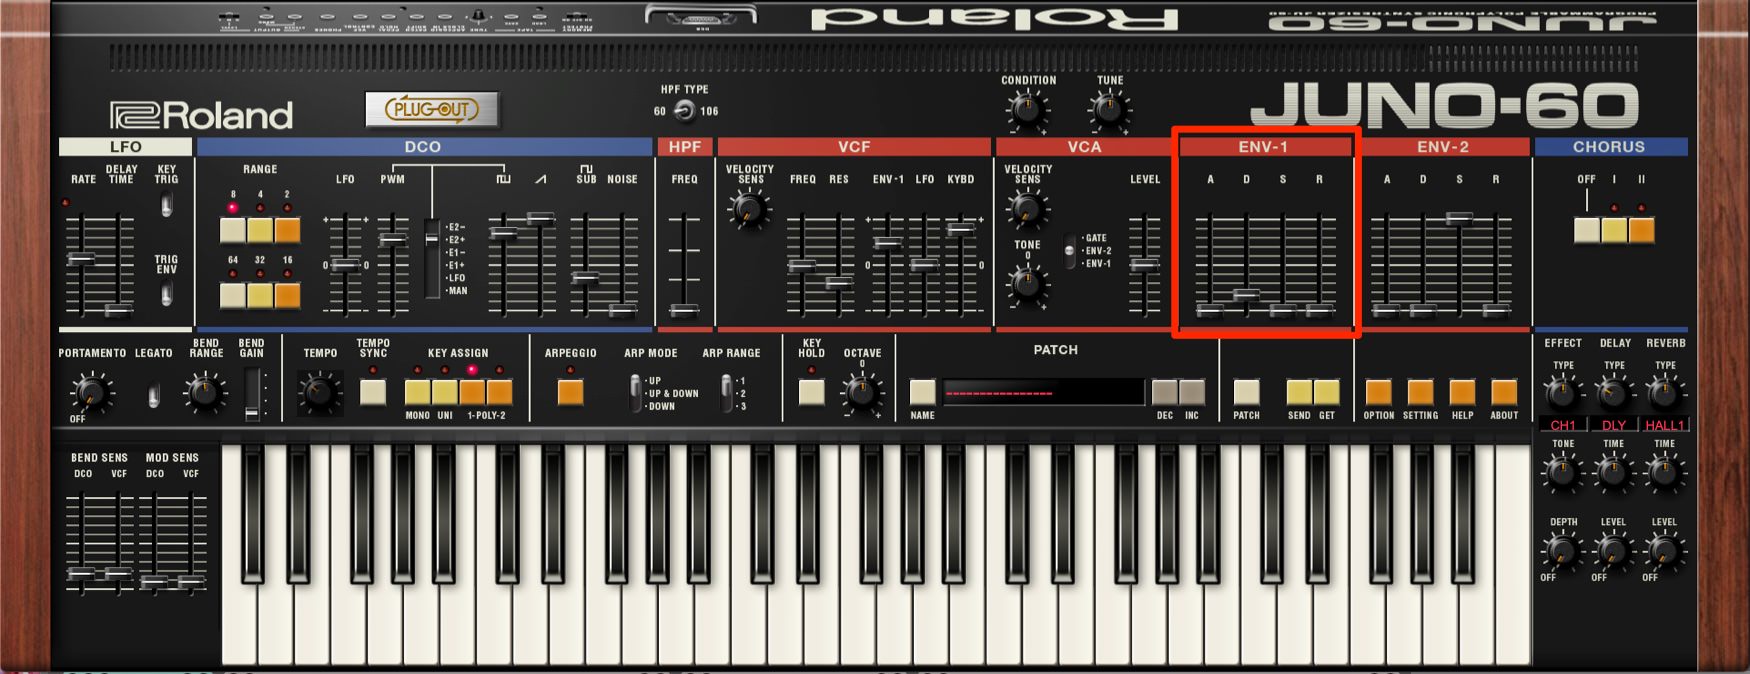
Things are coming along but there’s more work to be done. Let’s use an envelope to shape how the filter responds over time.
As we mentioned, the filter is connected to Envelope-1. Let’s set it so we get a little blip with each keypress, an effect that emulates the pluck on a bass guitar string. We can do this with the Decay setting on Env-1. We bring it up to around 15%. We also bring the sustain all the way down to 0.
Next, we need to allow the filter to be affected by the envelope. We do this with the Env-1 slider in the filter section and set it to around 75%, or halfway between 0 and full. Now we’ve got a short, sharp filter snap with each note.
With filter envelope applied:
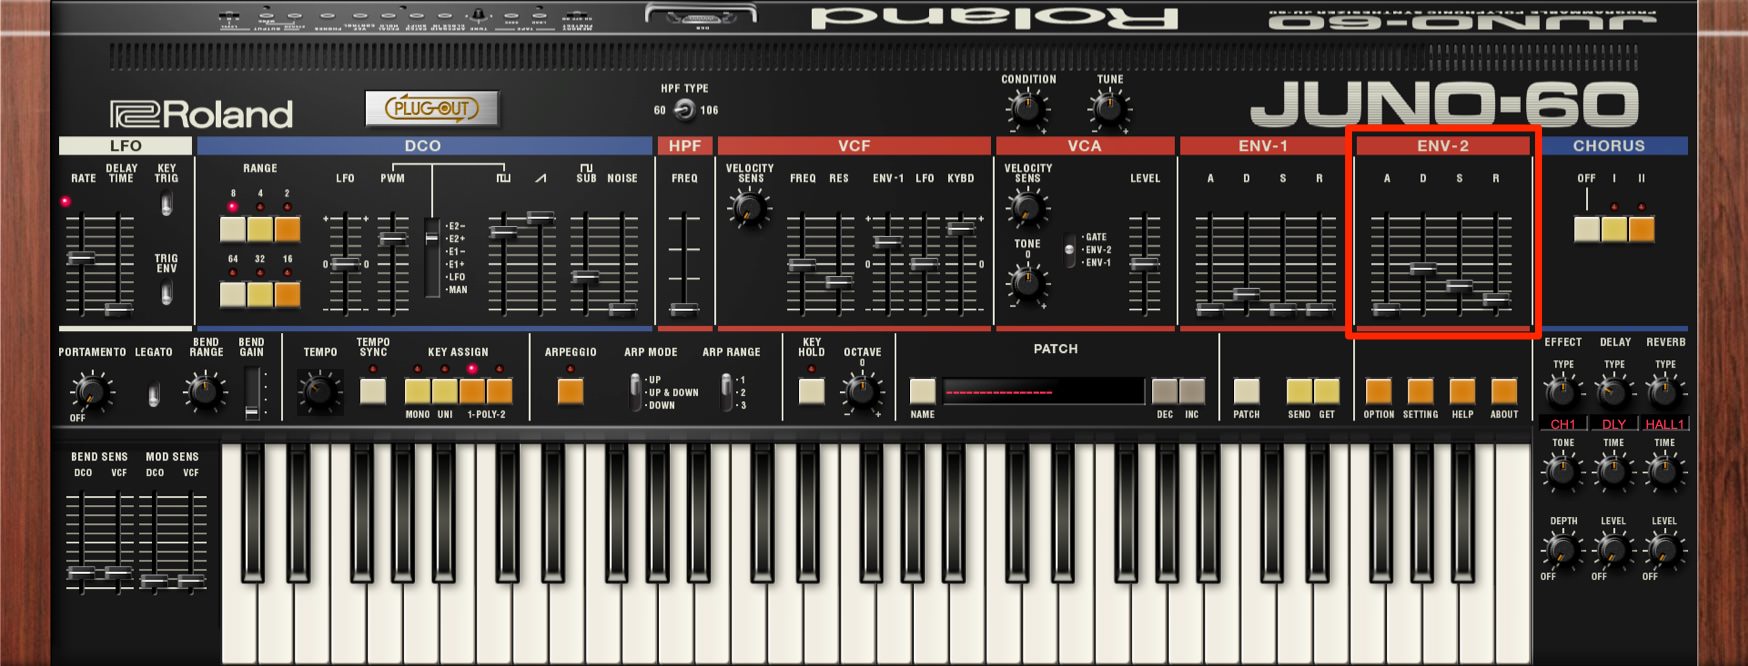
[advert] Step 4: VCA Envelope
Right now, the VCA envelope is set so that it’s acting like a gate, with just on/off settings like an organ. Let’s get this sorted.
We’re going to use Envelope-2 so we make sure that the VCA is set to Env-2, which it is. Next, we can dial in a suitable bass envelope shape. We leave Attack at 0 for a strong transient and bring Decay up to almost halfway. We’d like a little Sustain but not too much, as we want it to sound more like a bass guitar than a long and heavy blat. Around 25% works well. Finally, we bring up the Release just a little so the sound continues after we let go of the key.
Now with the VCA envelope:
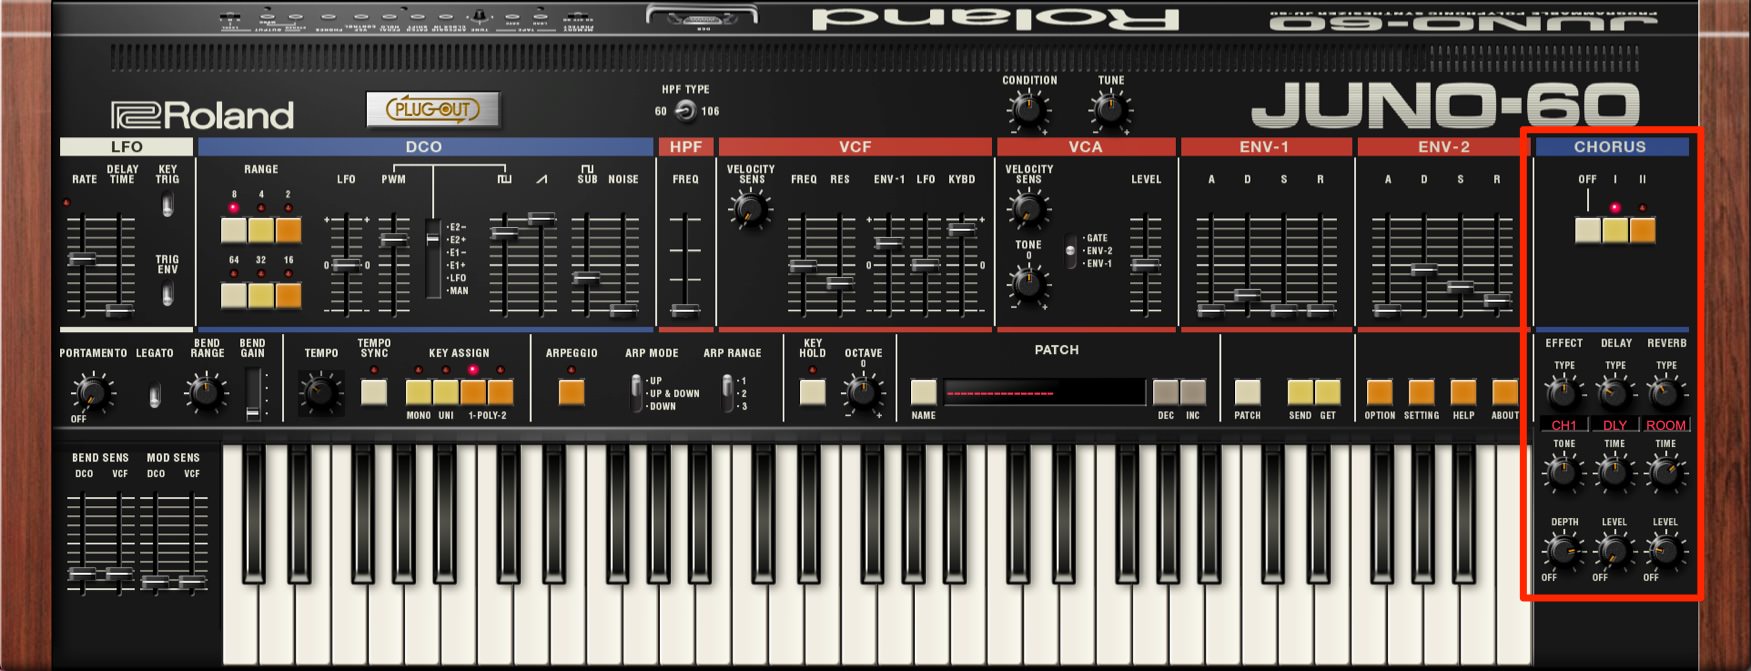
[advert] Step 5: Effects
It wouldn’t be a classic Juno-60 bass sound without a chorus, so let’s add that next.
Applying chorus is as easy as pressing a button, so we hit that yellow button for the slowest chorus effect. One of the perks of using a plugin version is that we can adjust how much of the effect we want. Below the Chorus section is the effects area. The first effect, CH1, stands for Chorus 1. We decrease the Depth amount to around 70%. This way we still get the famous chorus just at a more manageable level.
Finally, we add a little reverb for depth. In the third effect slot, we choose the Room algorithm by turning the Type knob. We then play with the Time and Level knobs until we get a nice bloom around the bass that doesn’t overwhelm it.
With chorus and reverb:
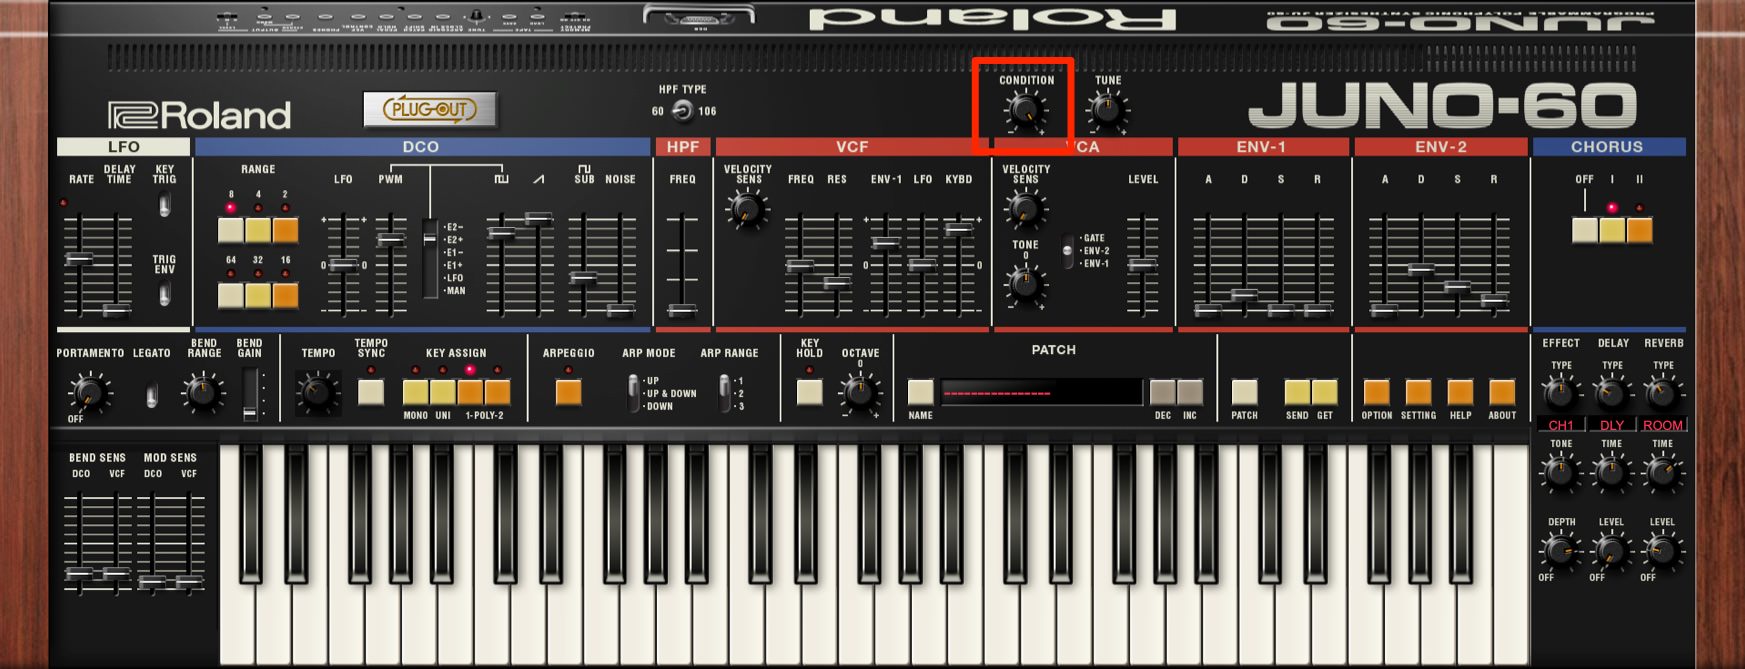
[advert] Step 6: Condition
For the final step, let’s adjust the Condition knob.
Many of the Roland Cloud instruments have a Condition dial. This allows you to control how clean of a sound you want. Turning it fully clockwise gives you tight tuning with no analog-style slop, while going in the other direction adds inconsistencies to the oscillator pitch and other parameters. We’re going for a more modern feel with our track so we turn it to the right.
With clean and tight condition:
Here’s the bassline in a finished track with additional production, plus loops from Splice’s Deep House Sessions, Ultimate Deep House Beats, and Ibiza Deep House sample packs.
[product-collection id=”75025″]
Latest Shows
Latest news
Gallery
-


Comments
This post currently has no comments.